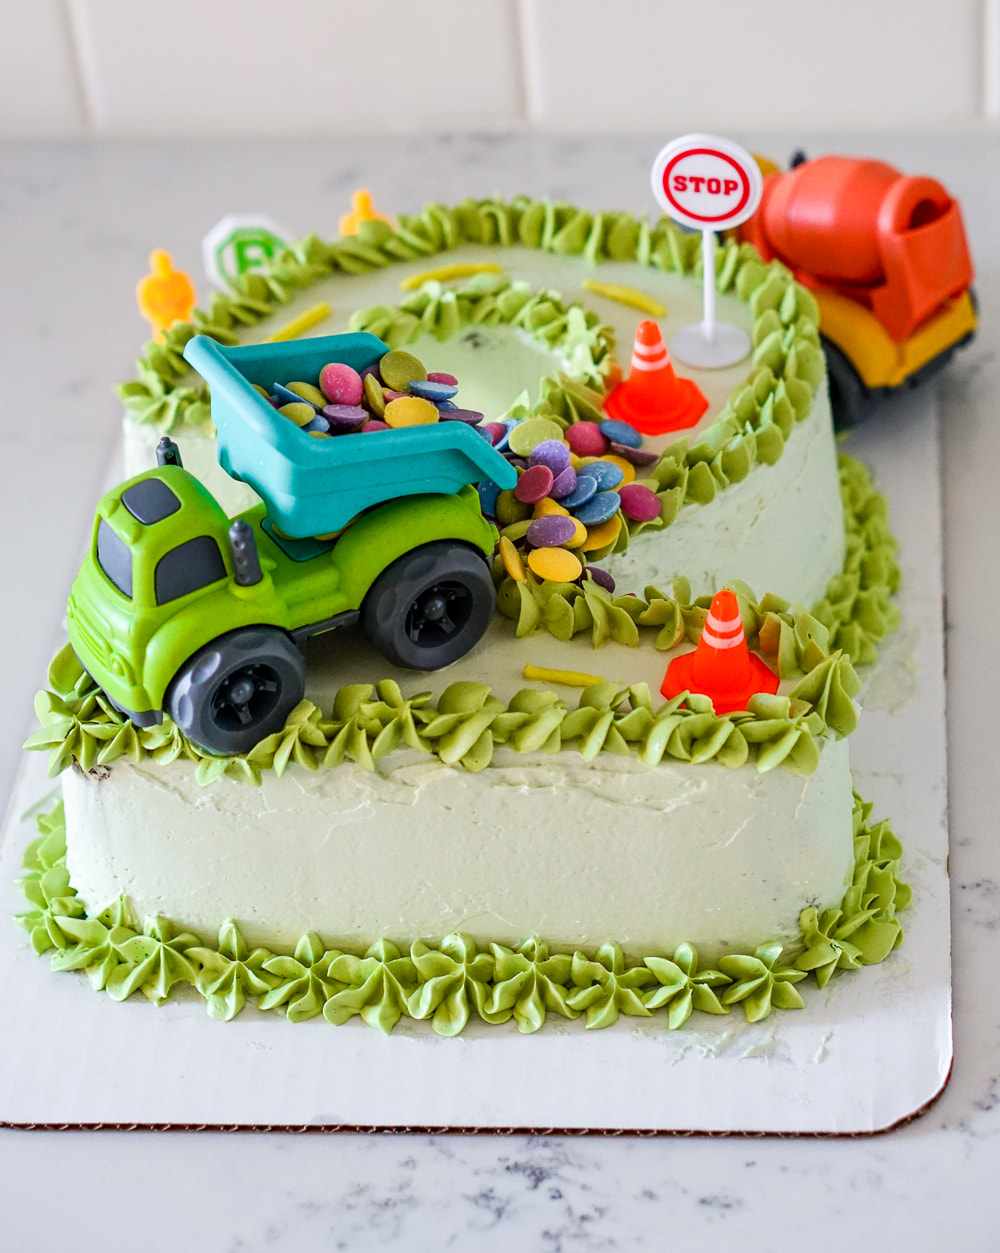
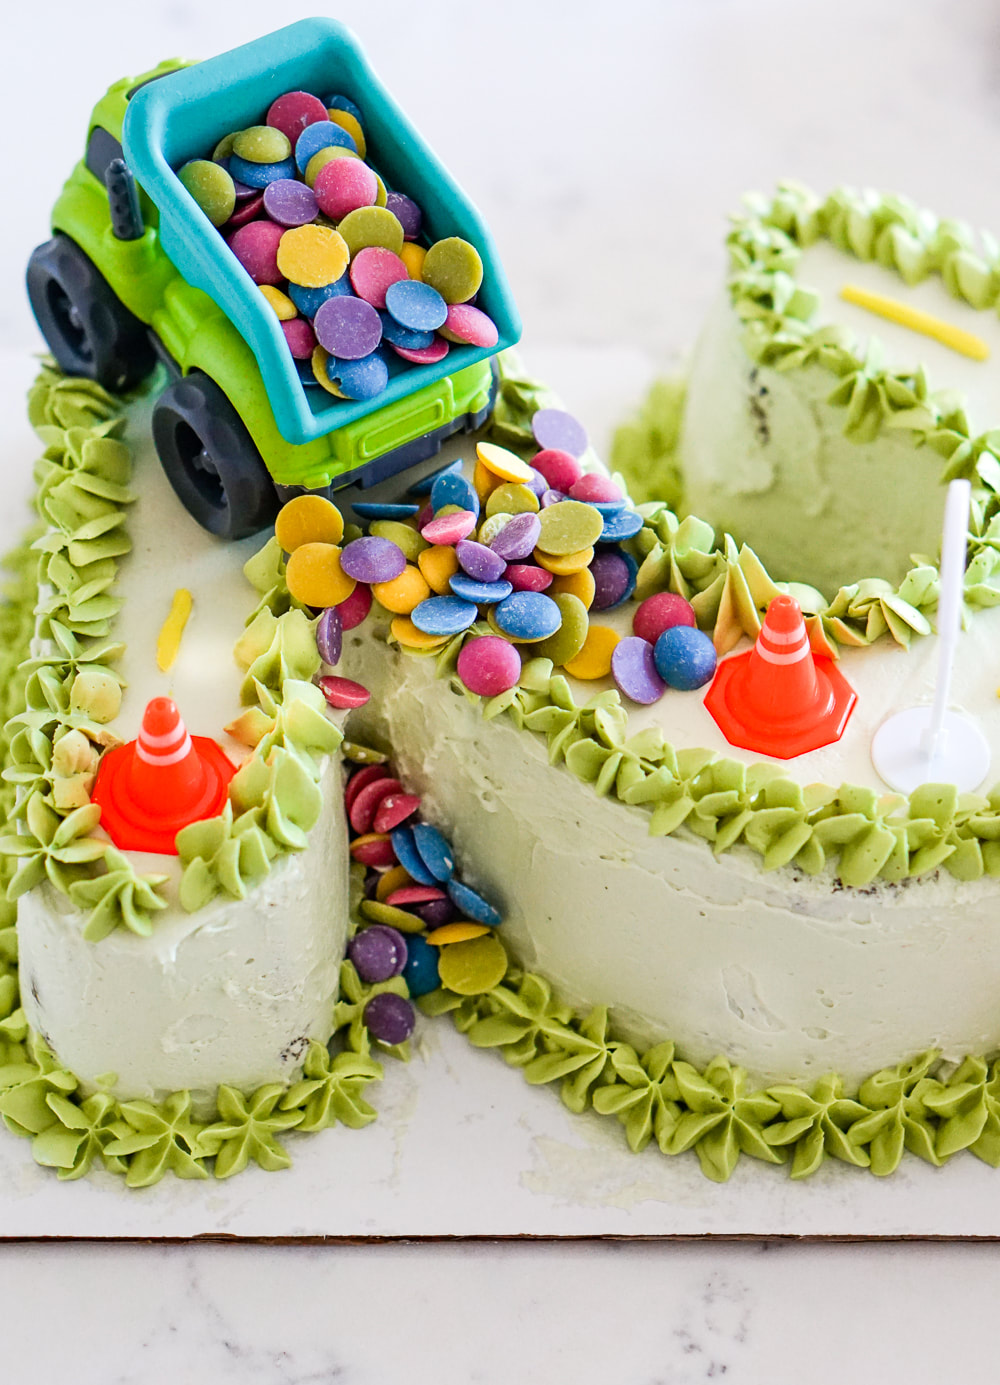
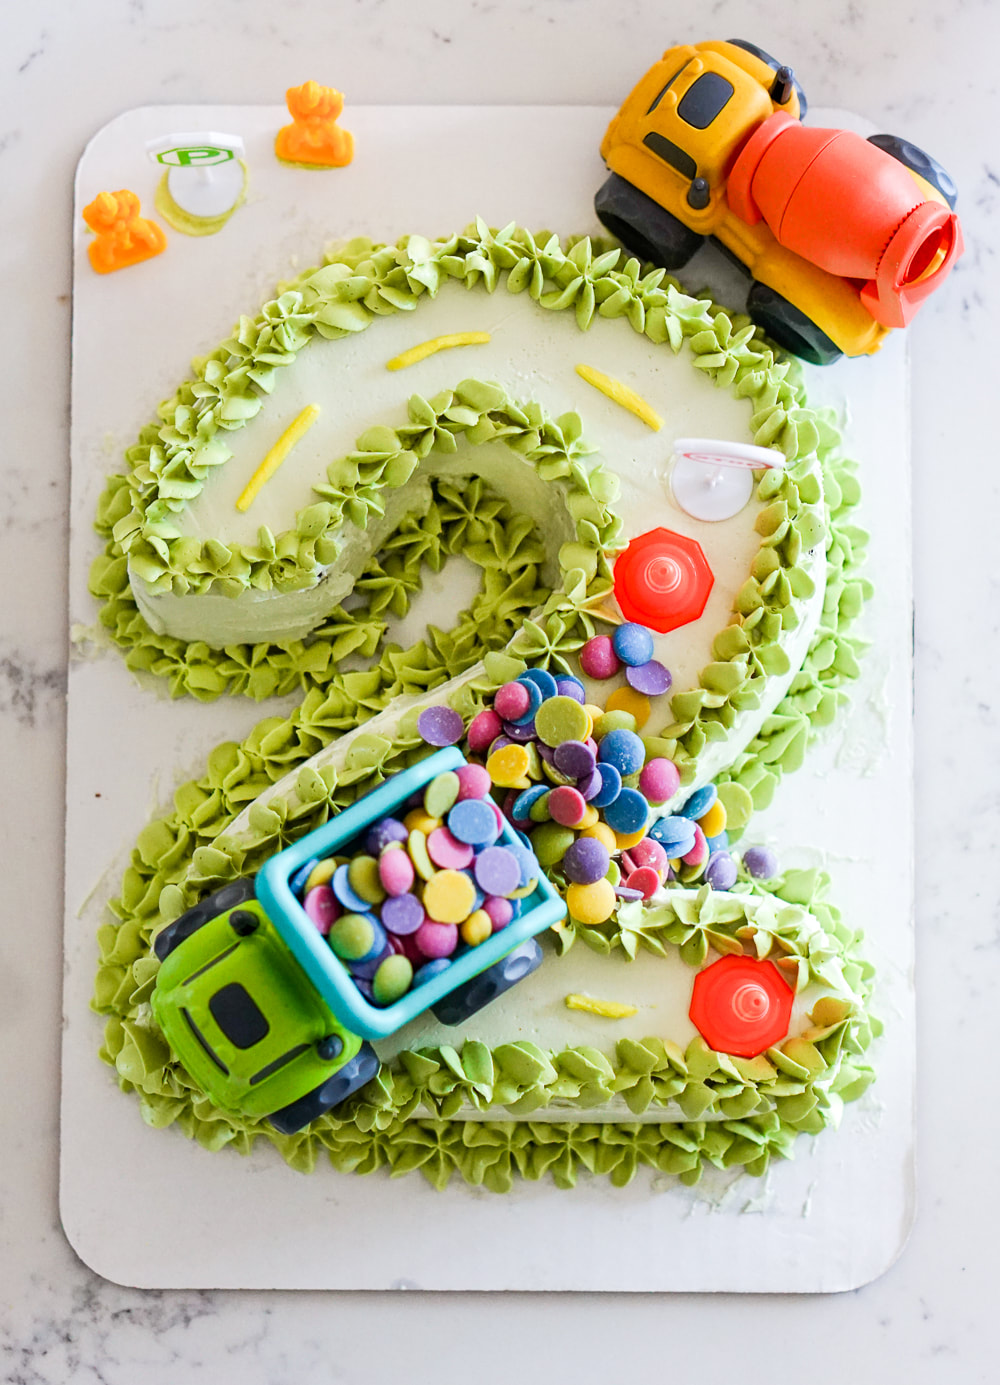
Noah’s 2nd birthday but after getting so many messages about it via Instagram, I figured I’d share a few tips and tricks and product links for all the other amateur baking moms like me who are just trying to make their kids’ birthday cake extra special for them! Since Noah is truck-obsessed, we went all in on the truck decorations, but you can buy whatever number you need and then pick your kid’s favorite thing or character and make that the theme of your cake!
The Supplies
Let’s start with what you’ll need to make your number cake:
- A number cake mold – I used this one which came with a frosting decorating pen that I used for the lines in the “road”.
- Cake decorating supplies – this set comes with silicone frosting piping bags, different piping tips, and cake scrapers to help make the frosting as smooth as possible. We used the flat one for the main part of the cake and the star piping tip for the frosting on the outer edges.
- Cake boards – this is what you’ll put the cake on when you frost it and decorate it. You can find a variety of colors but I just ordered this pack of them in white. If I were going all-in on the Pinterest-mom mode, I’d have decorated the cake board a bit more but I threw a truck and a couple little construction figures on there and called it a day!
- Decorations – get creative with your decorations based on your theme and find some fun, small trinkets that you can use on top of the cake and also on the cake board. This is what I used for Noah’s:
- I got him this set of toy trash trucks which came with the little cones, construction workers, and stop signs. The trucks were slightly too big for the top of the cake so I just used the other accessories instead and dug through his toys to find a truck that was the right size.
- A dump truck toy ended up being the perfect decoration because then I could use some fun, colorful chocolate chips to fill the back of the truck and “dump” onto the cake. Here is a link to the rainbow chips which are colored with natural spices and no food coloring (they make sprinkles, too)!
- Food coloring – I used this Whole Foods 365 brand of food coloring which uses vegetable juice and spices for coloring vs. dyes. It still isn’t the cleanest one out there… better than most, though!
- Last but not least… a recipe. More on that below!
The Cake – Tips & Tricks
- Cake recipe – For the recipe, I wanted a cake that was made with wholesome ingredients and lower in sugar than your typical cake. So you could either go totally homemade, or you could use a boxed mix. Last year, I made a small Smash Cake using this recipe, which was great, but I wanted to make things easier on myself this year (and make a larger cake), so I used Simple Mills boxed vanilla cake and vanilla frosting. To make the cake, it required two boxes of cake mix and two frostings.
- Make sure to place the silicone number mold on a baking sheet before pouring in the batter so it’s easier to transfer it in and out of the oven.
- You’ll want to make the cake in advance so you have time for it to cool completely and then refrigerate it before you frost it. If it’s still warm at all, the frosting will melt and things will get messy.
- Once the cake is done and frosted, keep it in the fridge. Take it out about 1-2 hours before serving time. I made the mistake of taking ours out right before we served it and it was a little bit too hard on the inside. Once it had sat at room temp for a bit it was much more delicious!
The Frosting – Tips & Tricks
- You’ll want your frosting to be nice and smooth before you start frosting your cake. If you’re using the Simple Mills frosting, it’s pretty thick, so I’d recommend putting it in a bowl and adding 1-2 tbsp of melted coconut oil and then using a hand mixer to blend it together until it’s velvety and smooth.
- To frost the cake, take big spoonfuls of frosting and start to cover the body of the cake with a knife or icing spatula. Then use the flat cake scraper to smooth out the top and sides as best as you can. Stick it back in the fridge to set before you start doing the accent frosting with your piping bag.
- While the cake is back in the fridge, mix the frosting with the food coloring to make it your desired color for the accent frosting. Obviously the more food coloring you use, the more vibrant the frosting.
- Here’s a tutorial on using a frosting piping bag that was helpful for a beginner like me! I used just the piping bag and the star tip (instructions start at 1:50 in the video) to add the little stars dots of frosting along the bottom and top edges of the cake.
- Once your cake is frosted, add your decorations!
I hope those tips were helpful for you baking mamas out there! Tag me in your cute birthday cakes at @weeknightbite so I can check them out!